

Stephen steps up his game
Stephen was just 9 years old when he began making toys and selling them to fill Christmas stockings. It grew really fast, fast enough that I had to start making him take profit to encourage him to keep working.
Well, now two years later, it is time for Stephen to move onto new interests. He will still do sewing (with myself often picking up slack.) But, to keep him motivated we really need to move into a new direction as well. And I told him that his plans have to be minus me for the most part. I need to get my shop opened and soon!
One day we were looking at ideas, and thought of one thing that we thought might be cool. Literally right then and there we got a message via his page on Facebook, someone looking for a specific gift.
I shot her a few photos of some items Stephen is considering making, and she ordered one right away! I hopped on Amazon for supplies, and tonight Stephen stepped into his new territory. Basically alone. I showed him how to do the basics, but then left him to his devices.
You guys…what he accomplished tonight has me so proud. He’s proud of it too. You could tell he really felt a sense of accomplishment.
I am going to show you in a few steps. I’ll not even tell you what it is so that you can be surprised at the end.
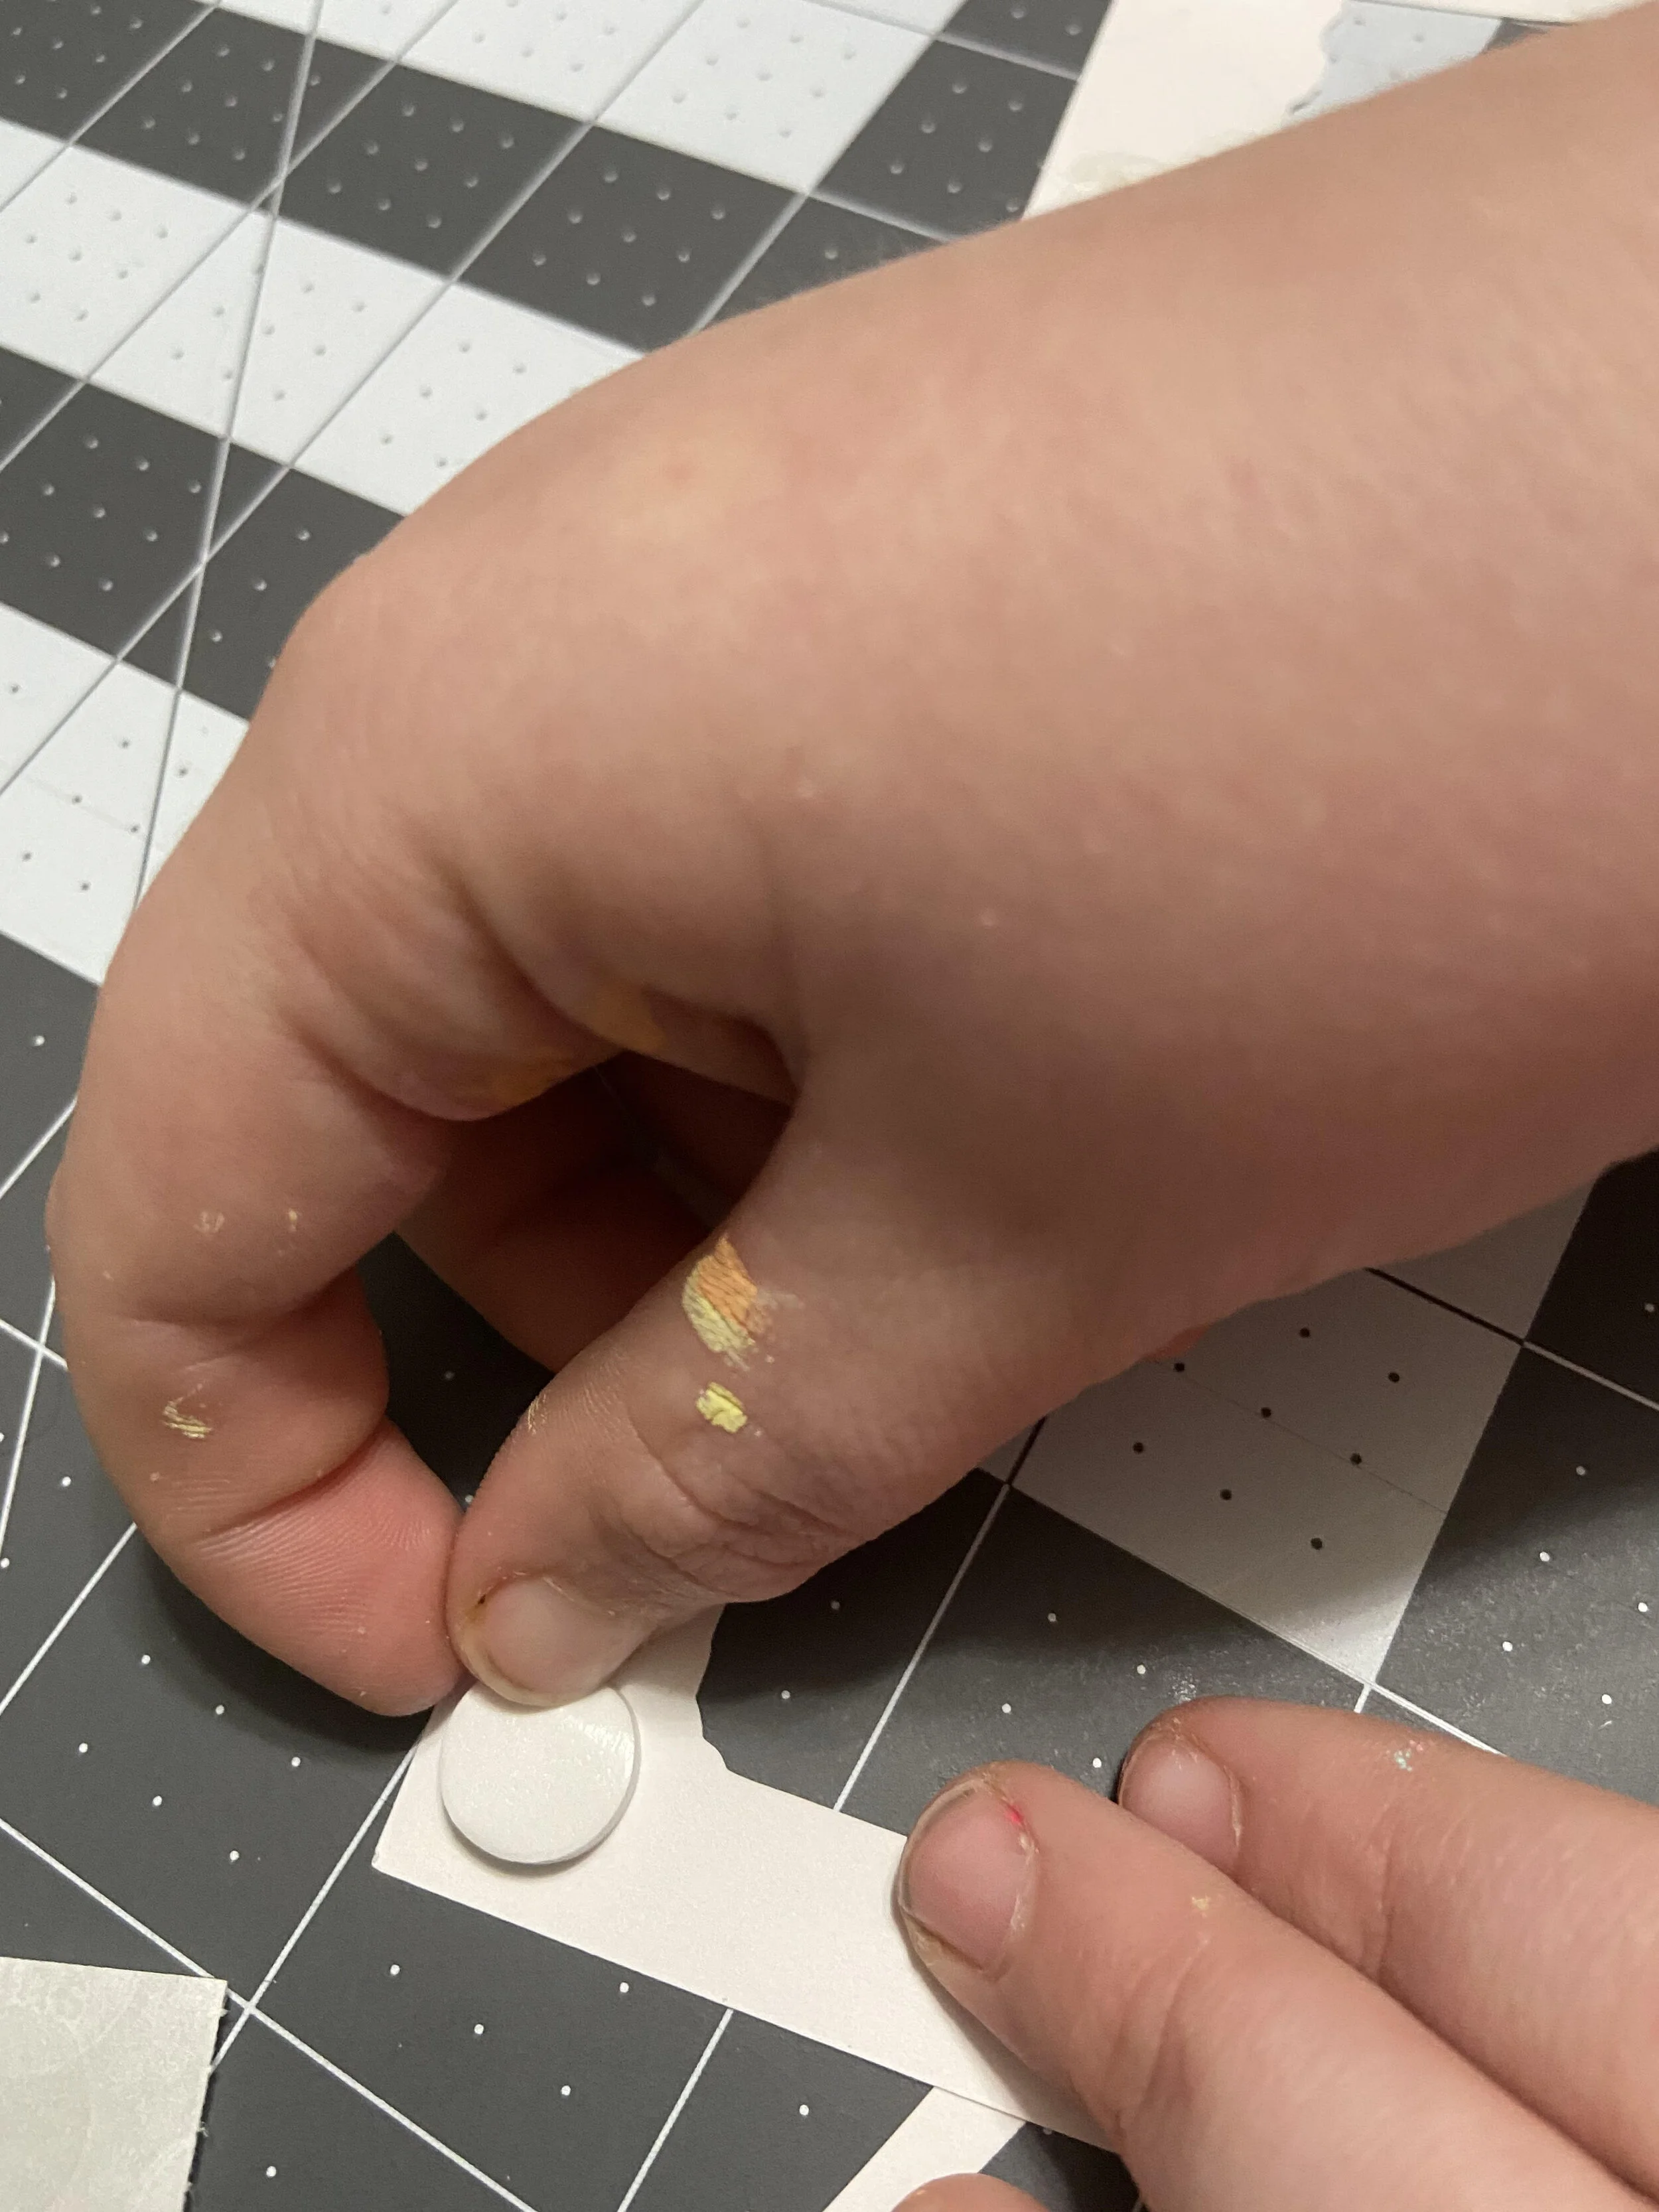
First of all, he used the Cricut to cut layered paper designs. Then he laid them all out upside down and marked them with little marks. Thirty marks to be exact (that is important.) Next he added glue dots. The little marks are the 30 lights from a 10 ft LED light string he is stringing between the layers of paper.
You can see in the photo below where he’s got his little circles and him stringing the lights.

So the next step is what amazed me the most. I did not help at all. Stephen literally painted each and every light, choosing different colors for his lay out. He would turn the papers over, look at them , and think about what lights he wanted where. LED fairy lights are tiny; paint markers make the painting process much easier.

After they were all painted and stuck to the layers, next he added foam circle spaces.
For the first two layers I helped him position the paper in just the right way to get the LED wires all hidden and out of the way, but after that he shooed me away to finish on his own. He wouldn’t let me look until he had it in a frame.
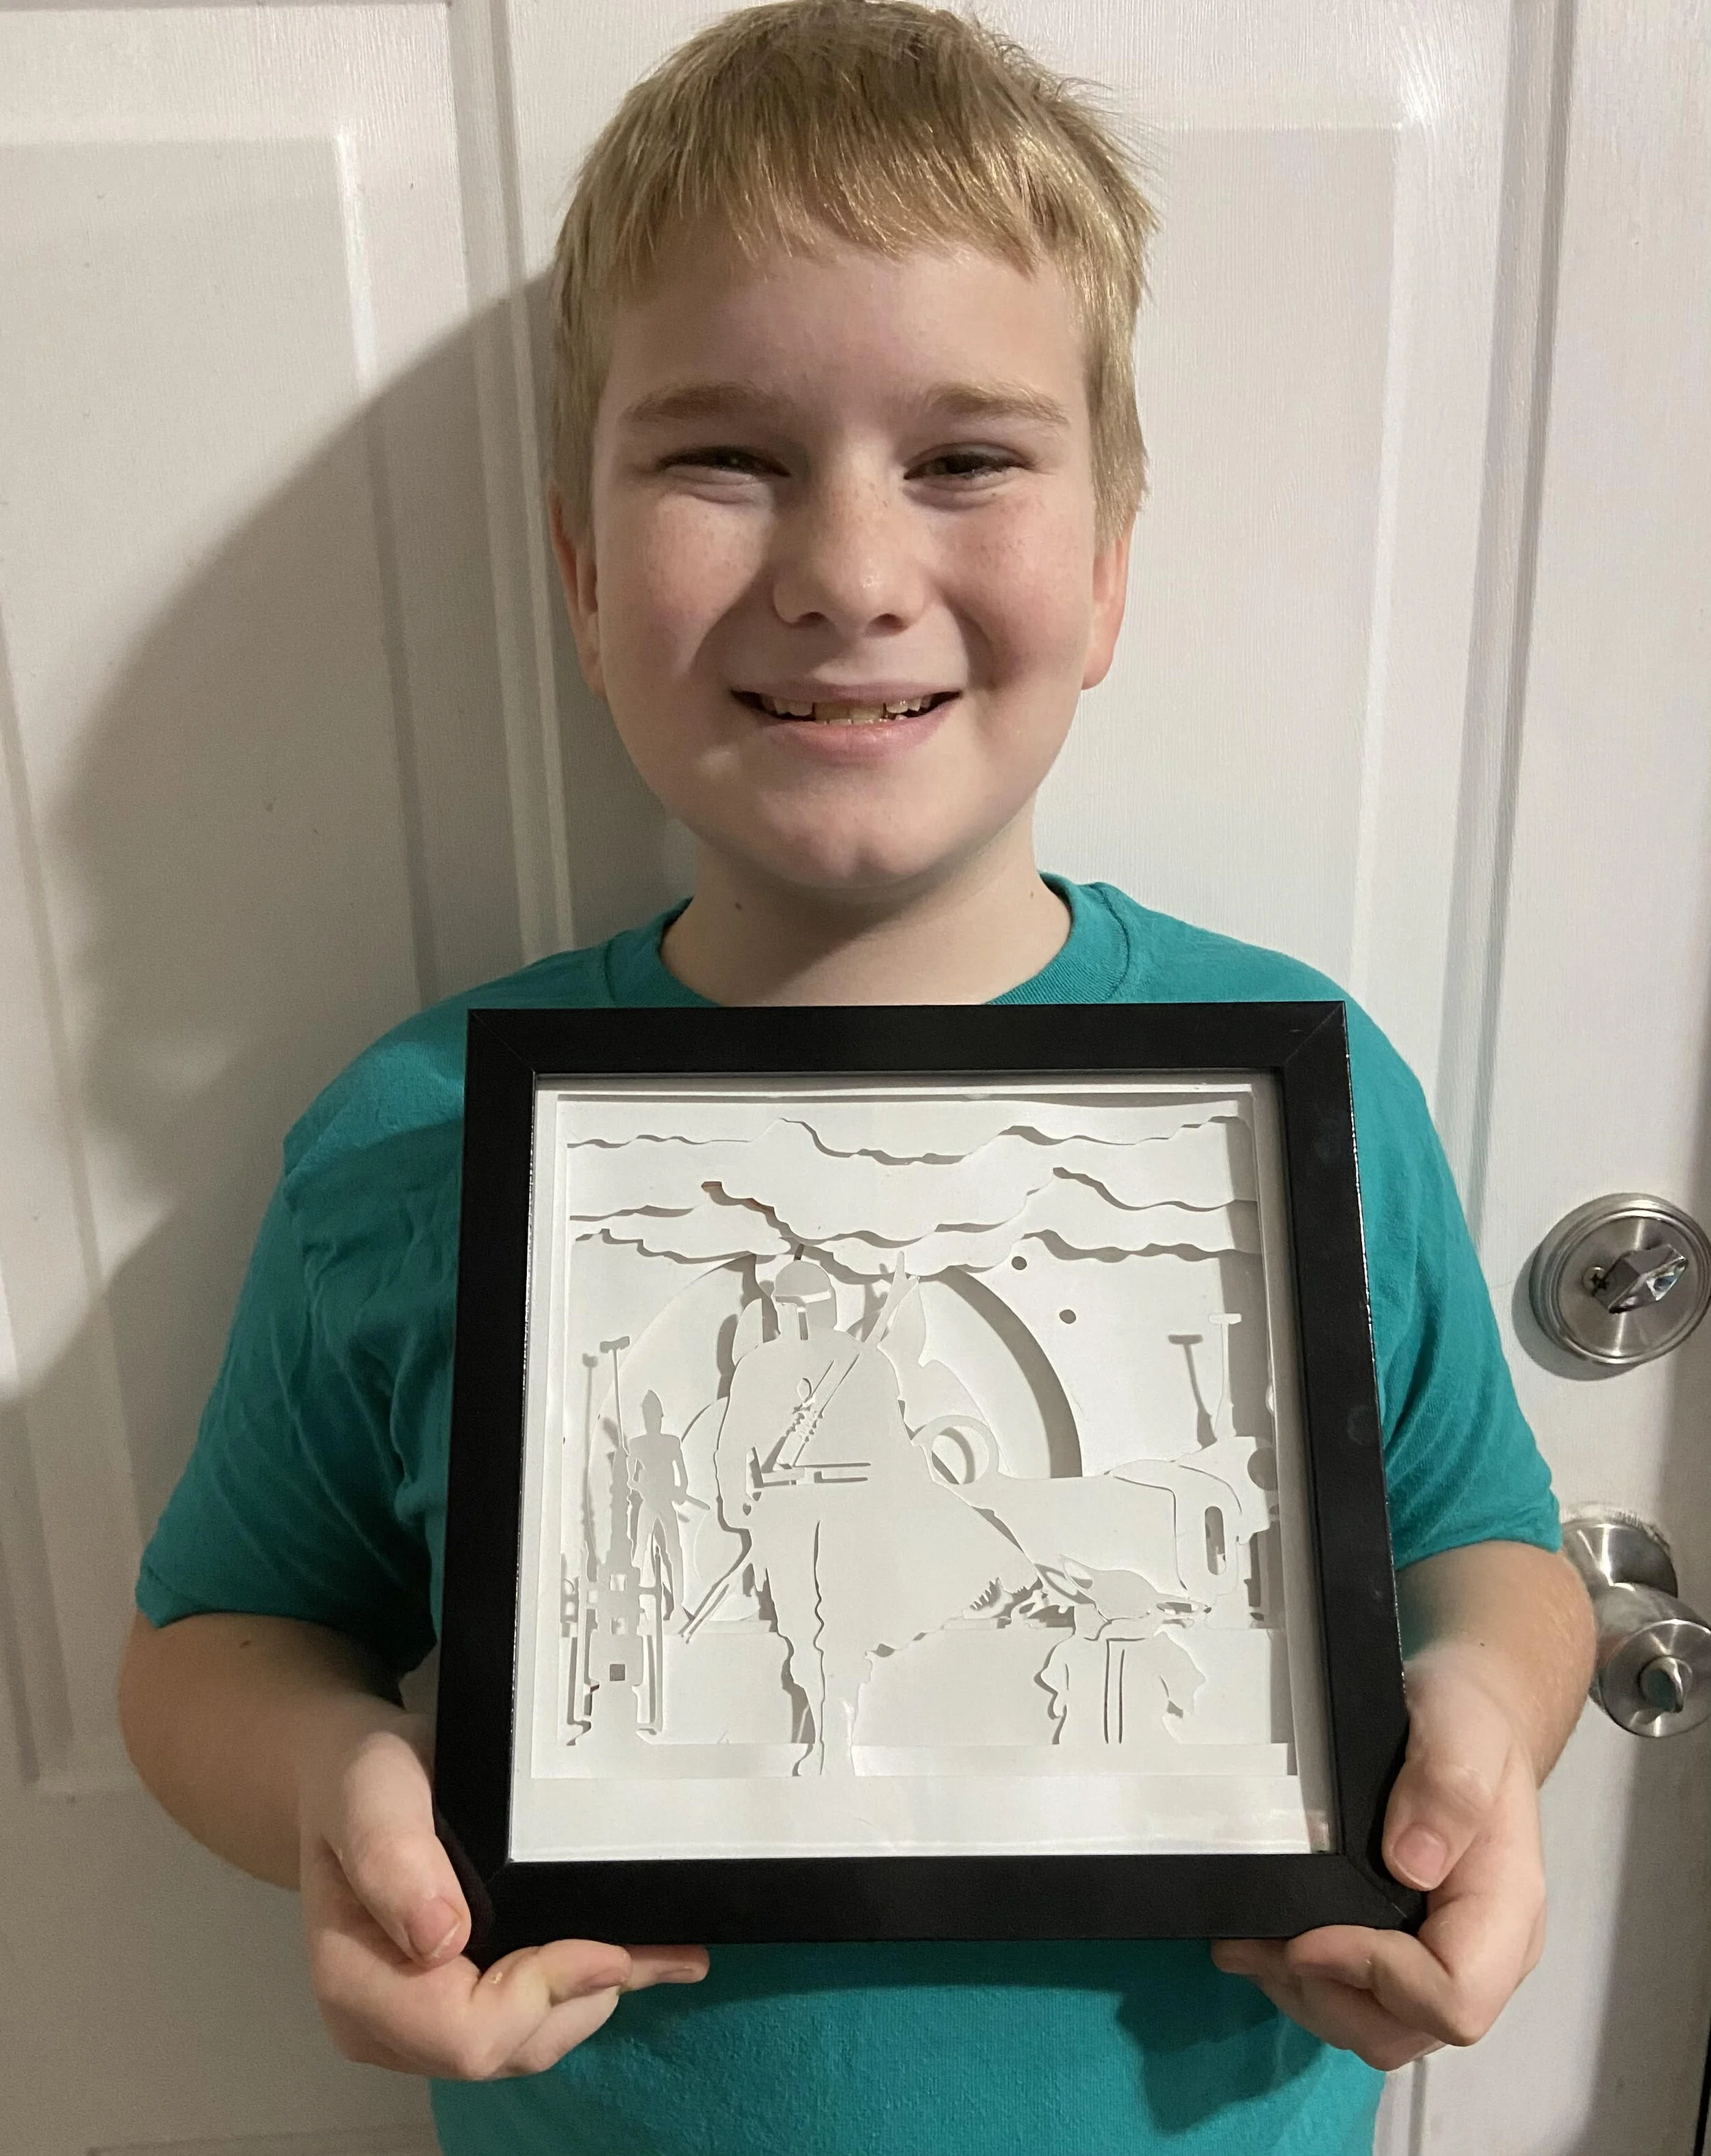
Then he took me into a dark room and showed me the final product. You guys… he hand painted those colors for those lights! They work with a flat battery LED that is just attached to the back of the frame.
Yes. I am one proud momma right now.

Time for us to go pick out some more designs. He is making one for himself next.
Cost?
These are an 8” x 8” frame. Due to the amount of time he puts into his shadow box frames, we are charging $35. I think he deserves that for all that work.
Non “inspired by” designs will be available on his page. Occasionally inspired by designs such as this will show up in the exclusive fb group. We will take requests on a first come, first serve basis. He has to do school first, and we will have to space out orders.
That kid of mine is growing up, and still not ceasing to amaze me.